There is always a trade-off between a centralized IT function and a federated IT function where the latter gives the developers flexibility around tools and technologies. However, as part of the centralized IT function, how can you enable federation and still manage the primary control?
This article takes you through the approach of managing Federated IT systems while you are adopting your DevOps journey towards increased automation and efficiency.
A lot of time is wasted across when you have to enable developers on projects which are spread across different technologies. The developers always needs some tools to be installed on to their systems based on project requirements. This increases hierarchical red-tape and overall MTTF (Mean-Time-To-Fulfillment)
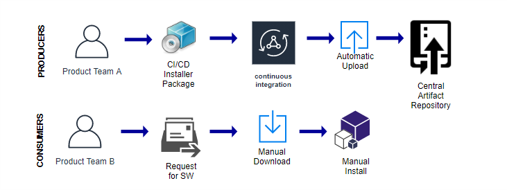
In general, the process will involve something like this:
The process can be further made efficient and automated by enabling federation using tools like CI/CD and a repository manager. The overall process can be hooked up to Jira Service Desk, Jenkins CI/CD and Nexus Antifactory.
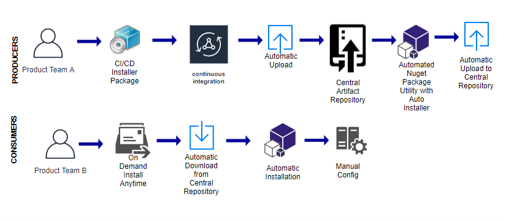
However, to further achieve more federation and enabling the developers to manage their own installs on-demand. This can be enabled using a package management tool.
The workflow will somewhat look similar to the diagram below:
However, in order to achieve full federation and support on-demand installation the team can further leverage PowerShell and Chocolatey.
Chocolatey supports installations across Windows and can pull artifacts from Nexus repository for installations. These packages can be auto generated using PowerShell and converted into Nuget Packages, as chocolatey uses a Nuget Package for installation from a Nuget Repository.
Using Jenkins and Powershell, the tested packages can be converted into Nuget Packages with in the integrated pipelines during build and release and made available for self hosted proprietary private NuGet repository under as strict access control using Nexus RBACs and Security Realms.
For internal packages, the above process can used to create and push new packages whenever application teams release a new version for other teams to consume it on demand.
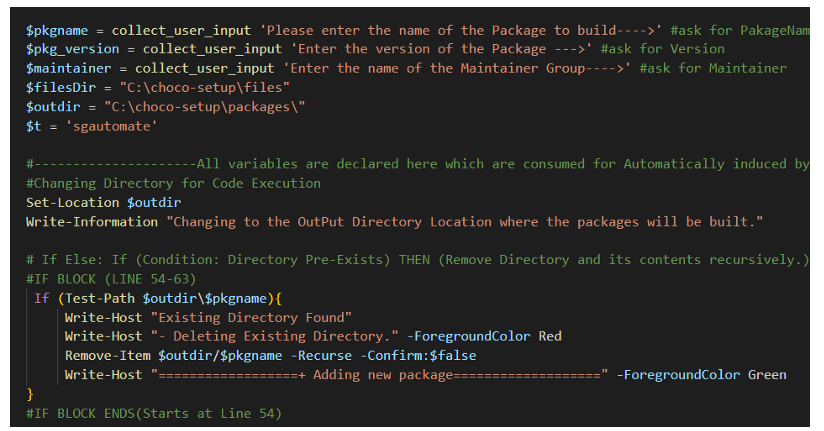
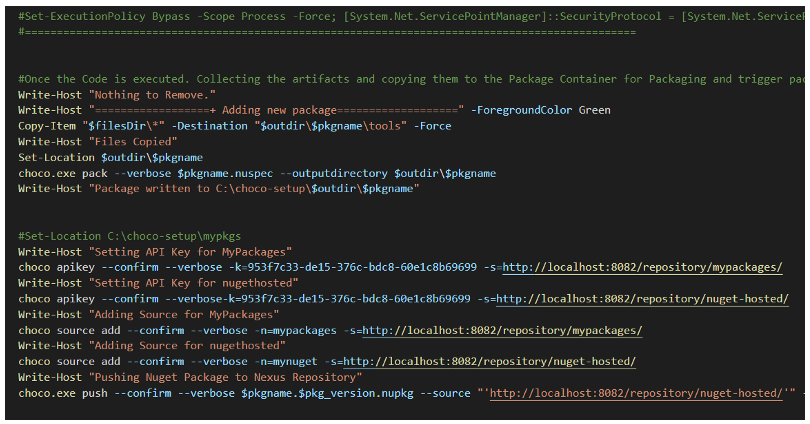
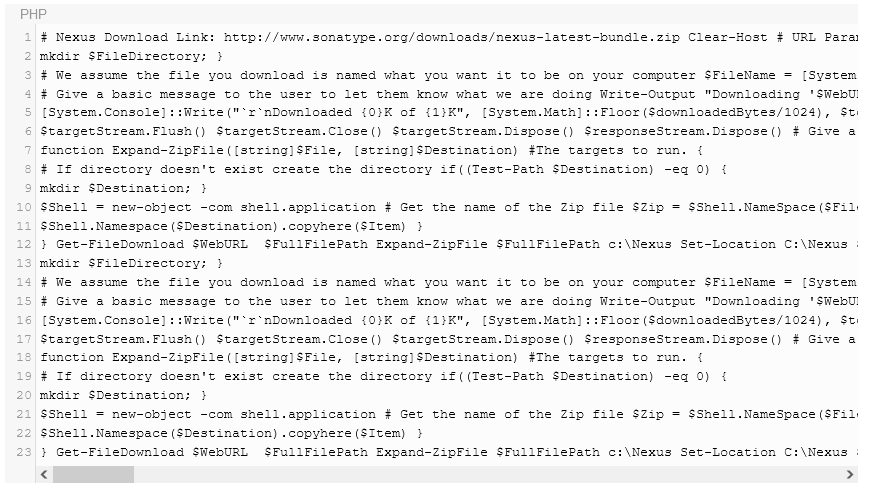
Here’s is an example of a Powershell Automation script which is used to automate the package conversion to Nuget Package. The package can comprise of any executable.
It collects the package variables from the variables defined during the build process and further integrates that to generate a Choco package using the chocolatey templating engine.
Note: This is a very generic script to give you a glimpse of what can be achieved.
The entire process can be broken down into 5 pieces as key baby steps to achieve such automation.
Define your own chocolatey Templates or use an existing one —